4.2.1Label
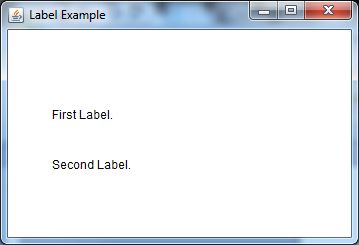
The object of Label class is a component for placing text in a container. It is used to display a single line of read only text. The text can be changed by an application but a user cannot edit it directly.
Example
|
1 2 3 4 5 6 7 8 9 10 11 12 13 14 15 |
import java.awt.*; class LabelExample{ public static void main(String args[]){ Frame f= new Frame("Label Example"); Label l1,l2; l1=new Label("First Label."); l1.setBounds(50,100, 100,30); l2=new Label("Second Label."); l2.setBounds(50,150, 100,30); f.add(l1); f.add(l2); f.setSize(400,400); f.setLayout(null); f.setVisible(true); } } |
output:-
Button
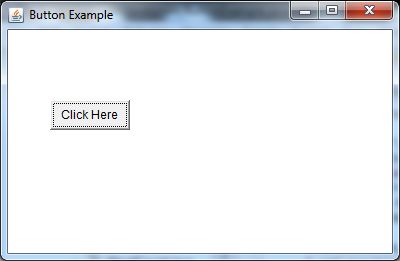
The button class is used to create a labeled button that has platform independent implementation. The application result in some action when the button is pushed.
|
1 2 3 4 5 6 7 8 9 10 11 12 |
import java.awt.*; public class ButtonExample { public static void main(String[] args) { Frame f=new Frame("Button Example"); Button b=new Button("Click Here"); b.setBounds(50,100,80,30); f.add(b); f.setSize(400,400); f.setLayout(null); f.setVisible(true); } } |
Output:
Checkbox
The Checkbox class is used to create a checkbox. It is used to turn an option on (true) or off (false). Clicking on a Checkbox changes its state from “on” to “off” or from “off” to “on”.
|
1 2 3 4 5 6 7 8 9 10 11 12 13 14 15 16 17 18 19 20 |
import java.awt.*; public class CheckboxExample { CheckboxExample(){ Frame f= new Frame("Checkbox Example"); Checkbox checkbox1 = new Checkbox("C++"); checkbox1.setBounds(100,100, 50,50); Checkbox checkbox2 = new Checkbox("Java", true); checkbox2.setBounds(100,150, 50,50); f.add(checkbox1); f.add(checkbox2); f.setSize(400,400); f.setLayout(null); f.setVisible(true); } public static void main(String args[]) { new CheckboxExample(); } } |
Output:

Choice
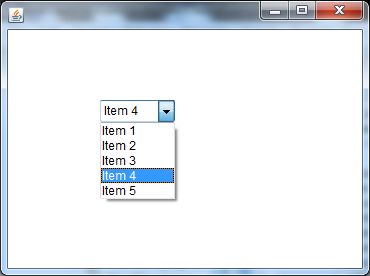
The object of Choice class is used to show popup menu of choices. Choice selected by user is shown on the top of a menu. It inherits Component class.
|
1 2 3 4 5 6 7 8 9 10 11 12 13 14 15 16 17 18 19 20 21 22 |
import java.awt.*; public class ChoiceExample { ChoiceExample(){ Frame f= new Frame(); Choice c=new Choice(); c.setBounds(100,100, 75,75); c.add("Item 1"); c.add("Item 2"); c.add("Item 3"); c.add("Item 4"); c.add("Item 5"); f.add(c); f.setSize(400,400); f.setLayout(null); f.setVisible(true); } public static void main(String args[]) { new ChoiceExample(); } } |
Output:
List
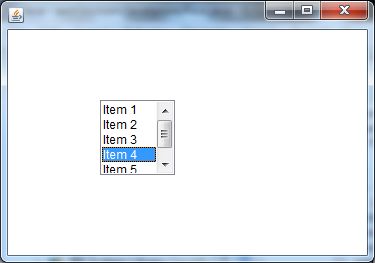
The object of List class represents a list of text items. By the help of list, user can choose either one item or multiple items. It inherits Component class.
|
1 2 3 4 5 6 7 8 9 10 11 12 13 14 15 16 17 18 19 20 21 22 |
import java.awt.*; public class ListExample { ListExample(){ Frame f= new Frame(); List l1=new List(5); l1.setBounds(100,100, 75,75); l1.add("Item 1"); l1.add("Item 2"); l1.add("Item 3"); l1.add("Item 4"); l1.add("Item 5"); f.add(l1); f.setSize(400,400); f.setLayout(null); f.setVisible(true); } public static void main(String args[]) { new ListExample(); } } |
Output:
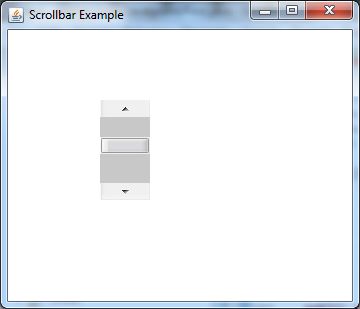
Scrollbar
The object of Scrollbar class is used to add horizontal and vertical scrollbar. Scrollbar is a GUI component allows us to see invisible number of rows and columns.
|
1 2 3 4 5 6 7 8 9 10 11 12 13 14 15 |
import java.awt.*; class ScrollbarExample{ ScrollbarExample(){ Frame f= new Frame("Scrollbar Example"); Scrollbar s=new Scrollbar(); s.setBounds(100,100, 50,100); f.add(s); f.setSize(400,400); f.setLayout(null); f.setVisible(true); } public static void main(String args[]){ new ScrollbarExample(); } } |
Output:
TextField
The object of a TextField class is a text component that allows the editing of a single line text. It inherits TextComponent class.
|
1 2 3 4 5 6 7 8 9 10 11 12 13 14 15 |
import java.awt.*; class TextFieldExample{ public static void main(String args[]){ Frame f= new Frame("TextField Example"); TextField t1,t2; t1=new TextField("Welcome to BIM Notes."); t1.setBounds(50,100, 200,30); t2=new TextField("AWT Tutorial"); t2.setBounds(50,150, 200,30); f.add(t1); f.add(t2); f.setSize(400,400); f.setLayout(null); f.setVisible(true); } } |
TextArea
The object of a TextArea class is a multi line region that displays text. It allows the editing of multiple line text. It inherits TextComponent class.
|
1 2 3 4 5 6 7 8 9 10 11 12 13 14 15 16 17 |
import java.awt.*; public class TextAreaExample { TextAreaExample(){ Frame f= new Frame(); TextArea area=new TextArea("Welcome to BIM Notes"); area.setBounds(10,30, 300,300); f.add(area); f.setSize(400,400); f.setLayout(null); f.setVisible(true); } public static void main(String args[]) { new TextAreaExample(); } } |
4.3 Layout Managers and Panel
A container has a so-called layout manager to arrange its components. The layout managers provide a level of abstraction to map your user interface on all windowing systems, so that the layout can be platform-independent.
AWT provides the following layout managers (in package java.awt): FlowLayout, GridLayout, BorderLayout, GridBagLayout, BoxLayout, CardLayout, and others. Swing added more layout manager in package javax.swing, to be described later.
Container’s setLayout() method
A container has a setLayout() method to set its layout manager:
// java.awt.Container
public void setLayout(LayoutManager mgr)
To set up the layout of a Container (such as Frame, JFrame, Panel, or JPanel), you have to:
- Construct an instance of the chosen layout object, via
newand constructor, e.g.,new FlowLayout()) - Invoke the
setLayout()method of theContainer, with the layout object created as the argument; - Place the GUI components into the
Containerusing theadd()method in the correct order; or into the correct zones.
For example,
// Allocate a Panel (container)
Panel pnl = new Panel(); // Allocate a new Layout object.
The Panel container sets to this layout.
pnl.setLayout(new FlowLayout());
// The Panel container adds components in the proper order.
pnl.add(new JLabel(“One”));
pnl.add(new JLabel(“Two”));
pnl.add(new JLabel(“Three”)); ……
Container’s getLayout() method
You can get the current layout via Container‘s getLayout() method.
|
1 2 3 |
Panel pnl = new Panel(); System.out.println(pnl.getLayout()); // java.awt.FlowLayout[hgap=5,vgap=5,align=center] |
Panel’s Initial Layout
Panel (and Swing’s JPanel) provides a constructor to set its initial layout manager. It is because a primary function of Panel is to layout a group of component in a particular layout.
|
1 2 3 4 5 |
public void Panel(LayoutManager <em>layout</em>) <span class="color-comment">// Construct a Panel in the given layout // By default, Panel (and JPanel) has FlowLayout</span> <span class="color-comment">// For example, create a Panel in BorderLayout</span> Panel pnl = new Panel(new BorderLayout()); |
6.1 FlowLayout

In the java.awt.FlowLayout, components are arranged from left-to-right inside the container in the order that they are added (via method aContainer.add(aComponent)). When one row is filled, a new row will be started. The actual appearance depends on the width of the display window.
Example
|
1 2 3 4 5 6 7 8 9 10 11 12 13 14 15 16 17 18 19 20 21 22 23 24 25 26 |
import java.awt.*; import javax.swing.*; public class MyGridLayout{ JFrame f; MyGridLayout(){ f=new JFrame(); JButton b1=new JButton("1"); JButton b2=new JButton("2"); JButton b3=new JButton("3"); JButton b4=new JButton("4"); JButton b5=new JButton("5"); JButton b6=new JButton("6"); JButton b7=new JButton("7"); JButton b8=new JButton("8"); JButton b9=new JButton("9"); f.add(b1);f.add(b2);f.add(b3);f.add(b4);f.add(b5); f.add(b6);f.add(b7);f.add(b8);f.add(b9); f.setLayout(new GridLayout(3,3)); //setting grid layout of 3 rows and 3 columns f.setSize(300,300); f.setVisible(true); } public static void main(String[] args) { new MyGridLayout(); } } |
6.2 GridLayout
GridLayout places components in a cell of a grid. Each cell has the same size, therefore, each component takes up the same space in a container. When the user adjusts the container, the size of each component changes accordingly.
Here are the constructors of the GridLayout class:
| Constructors | Description |
|---|---|
| public GridLayout(int rows, int cols) | Creates a grid layout with a given number of rows and columns. If cols or rows is zero, any numbers of components can be placed in a column or in a row. |
| public GridLayout(int rows, int cols, int hgap, int vgap) | Creates a grid layout with a given number of rows and columns. Beside this, you can initialize the vertical and horizontal gap between each of rows and columns. |
Here is the screenshot of GridLayout demo application

|
1 2 3 4 5 6 7 8 9 10 11 12 13 14 15 16 17 18 19 20 21 22 23 24 25 |
import java.awt.*; import javax.swing.*; public class Main { public static void main(String[] args) { JFrame frame = new JFrame("GridLayout Demo"); JButton btn1 = new JButton("Button 1"); JButton btn2 = new JButton("Button 2"); JButton btn3 = new JButton("Button 3"); JButton btn4 = new JButton("Button 4"); JButton btn5 = new JButton("Button 5"); // create grid layout with 3 rows , 2 columns with horizontal // and vertical gap set to 10 JPanel panel = new JPanel(new GridLayout(3,2,10,10)); // add buttons to the panel panel.add(btn1); panel.add(btn2); panel.add(btn3); panel.add(btn4); panel.add(btn5); frame.setDefaultCloseOperation(JFrame.EXIT_ON_CLOSE); frame.setSize(300,150); frame.getContentPane().add(panel); frame.setVisible(true); } } |
6.3 BorderLayout
The BorderLayout divides the container into five areas which include: PAGE_START, PAGE_END, LINE_START, CENTER and LINE_END.
You can use the constants of BorderLayout class to indicate the area where you want to place a component. If you enlarge the window, you can see that the center area take up as much of space as possible and the other areas only expand to fill available space.
You can set the horizontal and vertical gap between components by using methods setHgap() and setVgap().
|
1 2 3 4 5 6 7 8 9 10 11 12 13 14 15 16 17 18 19 20 21 |
import java.awt.*; import javax.swing.*; public class Main { public static void main(String[] args) { JFrame frame = new JFrame("BorderLayout Demo"); JButton btn1 = new JButton("Button 1 (PAGE_START)"); JButton btn2 = new JButton("Button 2 (CENTER)"); JButton btn3 = new JButton("Button 3 (LINE_START)"); JButton btn4 = new JButton("Button 4 (PAGE_END)"); JButton btn5 = new JButton("Button 5 (LINE_END)"); JPanel panel = new JPanel(new BorderLayout()); panel.add(btn1, BorderLayout.PAGE_START); panel.add(btn2, BorderLayout.CENTER); panel.add(btn3, BorderLayout.LINE_START); panel.add(btn4, BorderLayout.PAGE_END); panel.add(btn5, BorderLayout.LINE_END); frame.setDefaultCloseOperation(JFrame.EXIT_ON_CLOSE); frame.setSize(500,200); frame.getContentPane().add(panel); frame.setVisible(true); } |
MenuBar and Menu
The object of MenuItem class adds a simple labeled menu item on menu. The items used in a menu must belong to the MenuItem or any of its subclass.
The object of Menu class is a pull down menu component which is displayed on the menu bar. It inherits the MenuItem class.
|
1 2 3 4 5 6 7 8 9 10 11 12 13 14 15 16 17 18 19 20 21 22 23 24 25 26 27 28 29 30 |
import java.awt.*; class MenuExample { MenuExample(){ Frame f= new Frame("Menu and MenuItem Example"); MenuBar mb=new MenuBar(); Menu menu=new Menu("Menu"); Menu submenu=new Menu("Sub Menu"); MenuItem i1=new MenuItem("Item 1"); MenuItem i2=new MenuItem("Item 2"); MenuItem i3=new MenuItem("Item 3"); MenuItem i4=new MenuItem("Item 4"); MenuItem i5=new MenuItem("Item 5"); menu.add(i1); menu.add(i2); menu.add(i3); submenu.add(i4); submenu.add(i5); menu.add(submenu); mb.add(menu); f.setMenuBar(mb); f.setSize(400,400); f.setLayout(null); f.setVisible(true); } public static void main(String args[]) { new MenuExample(); } } |
Output:
